

With the supplied software ImageBrowser EX you can save MP4 movies and photos to your computer and easily organize them. Refer to the 'ImageBrowser EX Instruction Manual' (PDF file) for the full system requirements and other information.
Caution
The procedure is shown in Windows 7 for the purposes of explanation. The setting procedures and screens displayed may differ depending on your computer’s operating system.
Installing the Software
Install the software before you connect the camcorder to the computer for the first time. Make sure to install the software even if you have a different version of ImageBrowser EX on your computer. The auto-update function of the software may make available to you features optimized for this camcorder.
The 'ImageBrowser EX Instruction Manual' will also be installed with the software.
Caution
Before installing the software, make sure your computer is connected to the Internet.
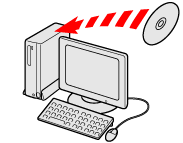
1. Insert the VIXIA/LEGRIA CD-ROM into the computer’s disc drive.
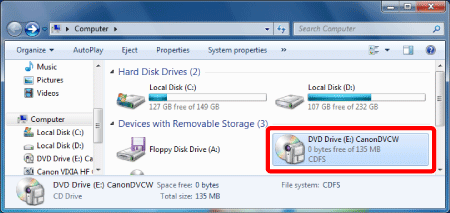
2. Open the drive into which you inserted the CD-ROM using Windows Explorer.
Caution
Mac OS: Use Finder and click on the CD-ROM icon.
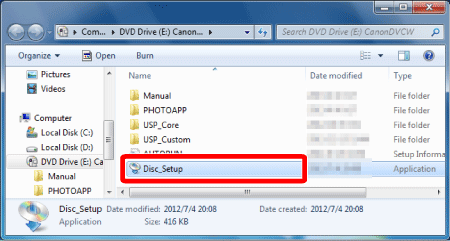
3. Click/Double-click the Disc_Setup.exe icon.
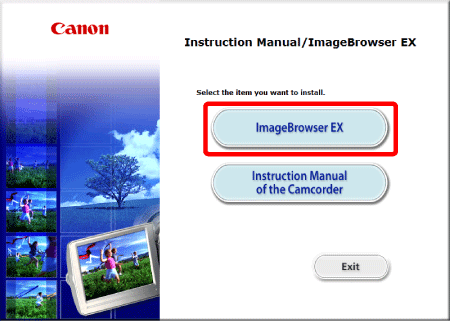
4. Click [ImageBrowser EX].
5. Follow the onscreen instructions to select your area (continent), country/region and language.
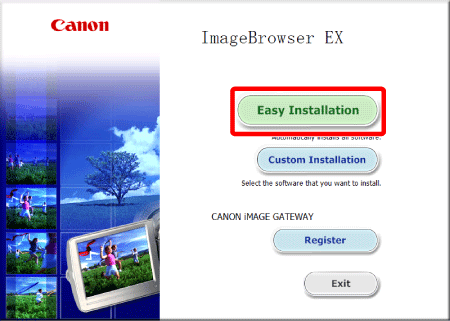
6. In the main installer panel, click [Easy Installation].

7. Follow the onscreen instructions to complete the installation.


Caution
To check that the software was installed correctly
- Windows: From the Start menu, All Programs ⋗ Canon Utilities ⋗ ImageBrowser EX
- Windows 8: On the Desktop screen.
- Mac OS: In the Dock, on the Desktop.
If you cannot find the icon, check your Internet connection and install the software again.
The first time you connect the camcorder to the computer, you also need to select the CameraWindow auto-launch setting.
Connecting the Camcorder to a Computer
1. Camcorder: Power the camcorder using the compact power adapter.

2. Set the power switch to ⋖MEDIA⋗.

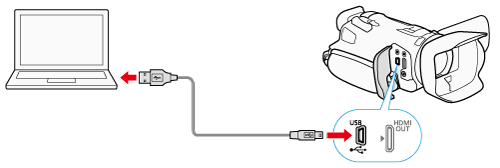
3. Connect the camcorder to the computer using the supplied USB cable.
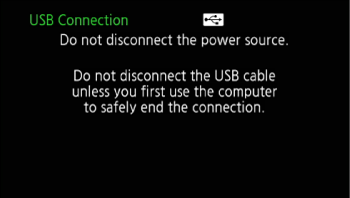
Camcorder: When the connection is successfully established, [USB Connection] appears on the screen.
4. Save the recordings onto the computer.
Caution
- Do not open the double memory card slot cover and do not remove the memory card.
- Do not access, change or delete any of the camcorder’s folders or files directly from the computer as this may result in permanent data loss.
- Do not open the double memory card slot cover.
- Do not disconnect the USB cable.
- Do not turn off the camcorder or the computer.
- Do not change the camcorder’s operating mode.
Caution
- Scenes exceeding 4 GB
- Scenes recorded at 35 Mbps exceeding 30 minutes
- Scenes recorded with a recording mode other than 35 Mbps exceeding 1 hour
Your camcorder is equipped with the standard Picture Transfer Protocol (PTP) allowing you to transfer photos (JPEG only) simply by connecting the camcorder to a computer using the supplied USB cable, without having to install the supplied software ImageBrowser EX.