

Solution
Connect the camera to the printer and print directly from the camera.
Caution
1. Connect the camera’s [A/V OUT / DIGITAL Terminal] and the printer’s USB terminal with an [interface cable].
2. Turn the printer's power on.
3. Press the ⋖Playback⋗ (
4. Operate the ⋖directional buttons⋗ left or right to display an image to print on the LCD monitor.
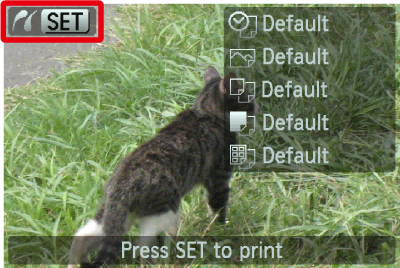
Make sure that the [SET] icon is displayed in the upper left corner of the LCD monitor, and then press the camera's ⋖FUNC./SET⋗ (
5. The screen for specifying the print settings appears.
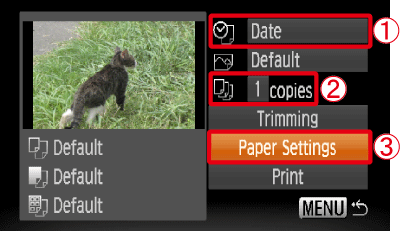
Operate the ⋖directional buttons⋗ left or right to select 
Operate the ⋖directional buttons⋗ left or right to specify 
Select 
6. The screen for setting the paper size appears.
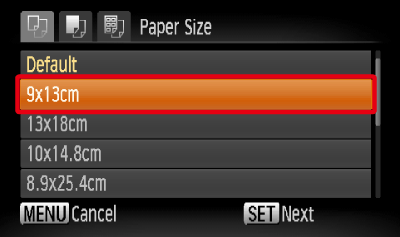
Operate the ⋖directional buttons⋗ up or down to select the paper size, then press the camera's ⋖FUNC./SET⋗ (
7. The screen for setting the paper type appears.
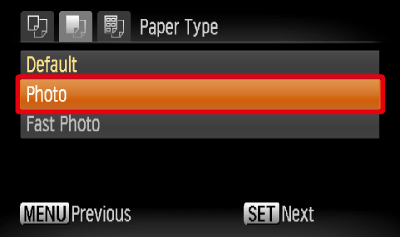
Operate the ⋖directional buttons⋗ up or down to select the paper type, and then press the camera's ⋖FUNC./SET⋗ (
8. The layout (border) settings screen appears.
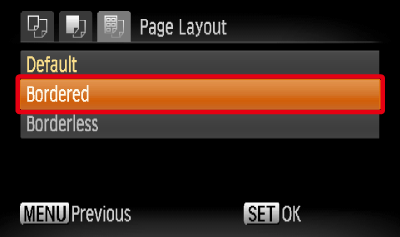
Operate the ⋖directional buttons⋗ up or down to select the layout type, and then press the camera's ⋖FUNC./SET⋗ (
9. Return to the print setting screen.
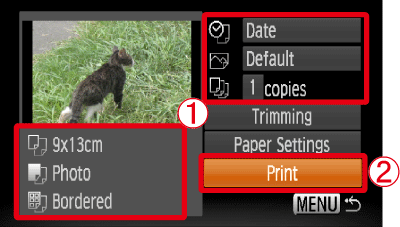
Select