You can connect your camera to a printer and print using Wi-Fi.
When establishing a wireless connection with a printer, you can either use the camera as an access point (Camera Access Point Mode) or use another access point.
Caution
Caution
Connecting Your Camera and Printer via Wi-Fi
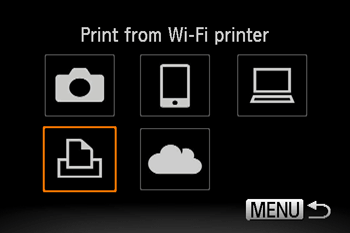
Register the printer you want to connect to using Wi-Fi.
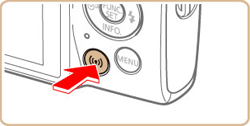
1. Press the [ 
Caution
 ] or [
  ] buttons to choose [OK], and then press the [
  ] button.
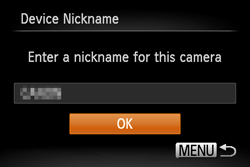
] or [ ] buttons to select the text box, and press the [  ] button to access the keyboard. After you have finished entering the nickname, press the [MENU] button to return to the registration screen, press the [ ] button, choose [OK], and then press the [ ] button.
 2. Press the [ 


3. Press the [
Caution
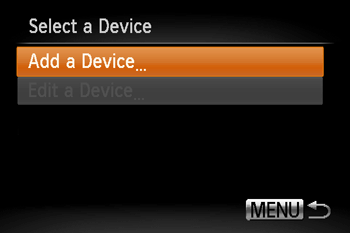
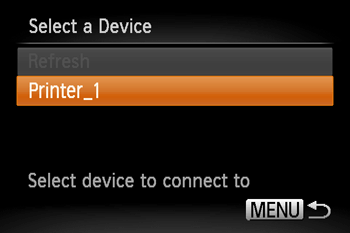
] or [ ] buttons to choose the device, and then pressing the [ ] button. To add a new device, display the device selection screen by pressing the [ ] or [ ] buttons and configure the setting. If you prefer not to display recent target devices, press the [MENU] button -⋗ [  ] tab -⋗ [Wireless settings] -⋗ [Wi-Fi Settings] -⋗ [Target History] -⋗ [Off].
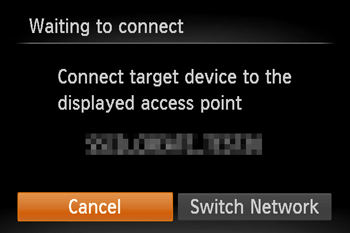
4. Choose the displayed SSID (network name) from the printer's Wi-Fi setting menu.
Caution
If you open the [
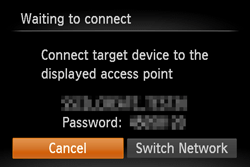
5. Once the printer is ready for the connection, the printer’s name will be displayed on the camera. Press the [
6. After the printer has been registered, a screen similar to the following one will be displayed.
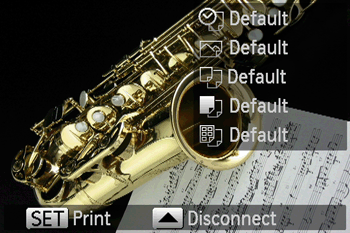
Printing Images
7. Press the [
8. The menu items will be displayed.
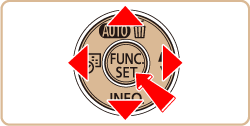
Press the [ 
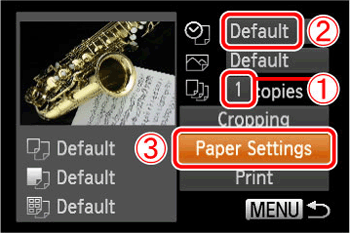
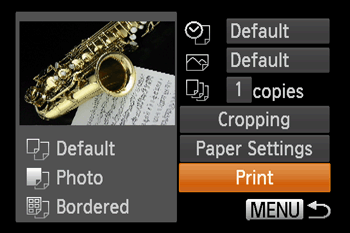
9. The screen for specifying the print settings appears.
] or [ ] buttons to choose (  ), and then press the [ ] or [ ] buttons to make the setting. ] or [ ] buttons to choose (
  ). Then, press the [ ] or [ ] buttons to make the setting. ]or [ ] buttons to choose [Paper Settings] (
  ), and then press the [ ] button.
 10. The screen for setting the paper size appears.
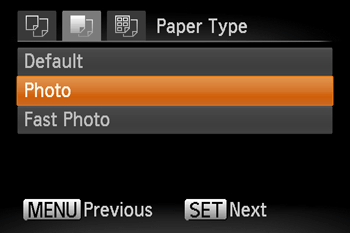
Press the [

11. The screen for setting the paper type appears.
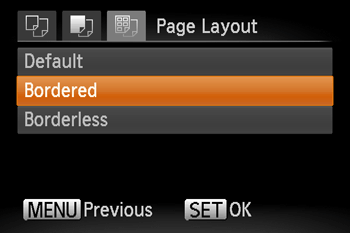
Press the [
12. The layout (border) settings screen appears.
Press the [
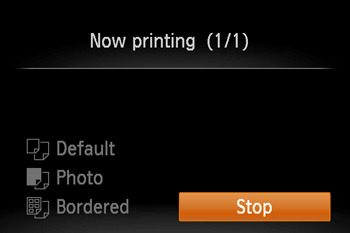
13. The camera returns to the print setting screen.
Make sure that the settings are correct and press the [
14. Printing now begins.