


Using the supplied software Data Import Utility to save your movies, you have the additional advantage of automatically joining scenes that were saved as multiple files so you can work with them as single scenes with the editing software of your choice.
Caution
The procedure for installing Data Import Utility on Windows 7 is shown for the purposes of explanation.
The screens displayed and setting procedures may differ depending on your computer’s operating system.
Caution
See Installation and System requirements in the Data Import Utility Software Guide (PDF file) for step-by- step installation instructions and full system requirements.* In order to view the PDF manual, Adobe®Reader® 6 or later must be installed on your compute.
Installing Data Import Utility
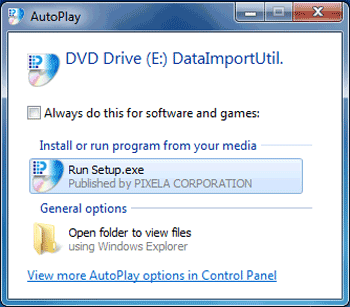
1. Insert the software disc into the computers disc drive.
The installation window will appear.
*Click [Yes] (Windows 7) if the [User Account Control] dialog box is displayed.
Caution
If the installation screen is not displayed, open the disc drive window from [My Computer] in the [Start] menu, and double-click [setup.exe].
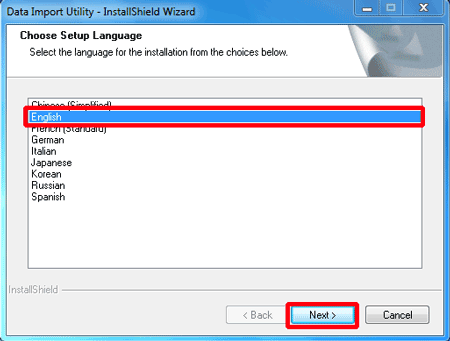
2. Select the language for the installation and click [Next].
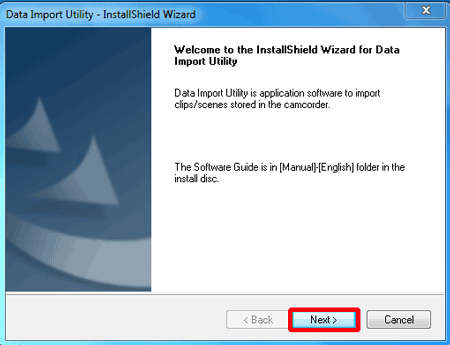
3. Click [Next].
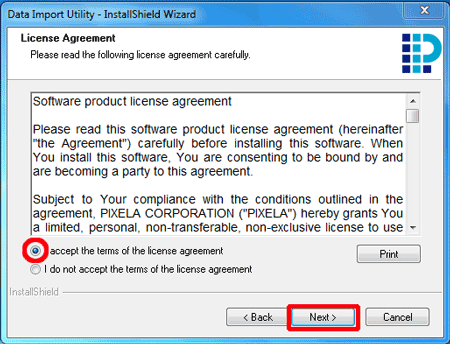
4. Confirm the license agreement and click [I accept the terms of the license agreement].
Click [Next].
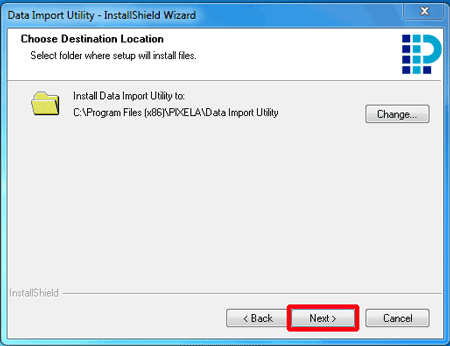
5. Select the destination folder for the installation files and click [Next].
The files will be saved to the following location by default:
C:\Program Files\PIXELA\Data Import Utility
If you want to change the destination folder, click [Change...] and specify the destination.
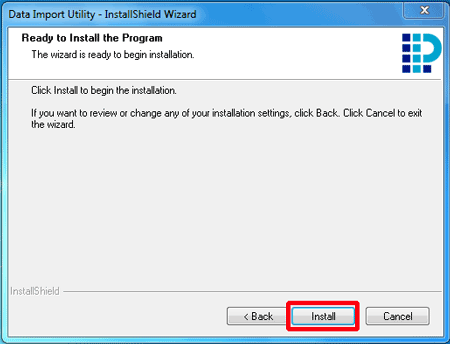
6. Click [Install] to begin the installation.
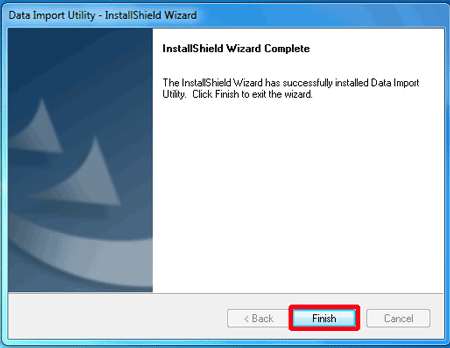
7. Once the installation is completed, click [ Finish ].
The installation of Data Import Utility is completed.
Caution
When installation is finished, the following icon will appear on the Desktop.
[ 