Solution
Connecting camcorderImporting the recorded video files to a computer using PIXELA Transfer Utility SD
Importing the recorded video files to a computer using PIXELA VideoBrowser SD
To import recorded videos to a computer, it is necessary to install the PIXELA Transfer Utility SD or PIXELA VideoBrowser SD software provided.
Connecting camcorder
1. Power the camcorder using the compact power adapter.
2. Turn on the camcorder and set it to the movie playback mode.
*You cannot import video files in still image playback mode.
3. Connect the camcorder and the computer with the USB cable supplied with the camcorder.
Connect directly to the computer. Operation using a USB hub is not guaranteed.
Caution
Click [Continue] (Windows Vista) / [Yes] (Windows 7) if the [User Account Control] dialog box is displayed.
Importing the recorded video files to a computer using PIXELA Transfer Utility SD
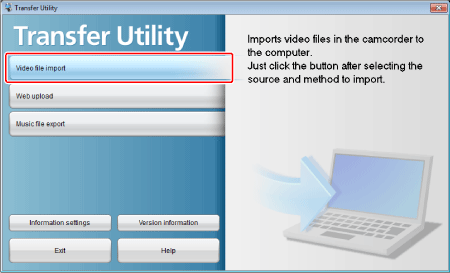
1. The start screen will be displayed.
Click [Video file import].
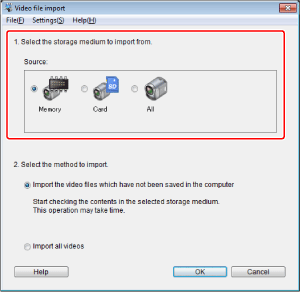
2. Select the memory that contains the video files you want to import.
| Icon | Content |
|---|---|
 | The built-in memory of the camcorder. |
 | The SD Memory Card inserted in the camcorder. |
 | Both the built-in memory and SD Memory Card in the camcorder. |
 | A card reader/writer or other devices. |
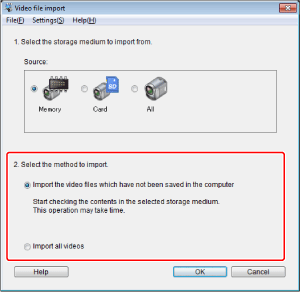
3. Select the method to import.
Caution
Imported video files will be saved in the following location:
C:\Users\(User account name)\My Videos\Import Video Data for SD
*Files are saved in [My Documents] if [My Videos] does not exists.
C:\Users\(User account name)\Video\Import Video Data for SD
*Files are saved in [My Document] if [My Video] does not exists.
C:\Documents and Settings\(User account name)\My Documents\My Video\Import Video Data for SD
*Files are saved in [My Documents] if [My video] does not exists.
4. Click [OK].
Importing the recorded video files to a computer using PIXELA VideoBrowser SD
Caution
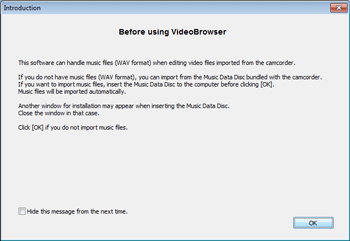
Music Data Disc
When editing video files with VideoBrowser, you can use music files of WAV format. If you do not have the music files of WAV format, you can import them from the Music Data Disc bundled with the camcorder.
If you want to import, insert the Music Data Disc while the screen on the bottom is displayed. Importing will start automatically.
Check the box if you do not want to display this message from the next time.
1. Click [ 
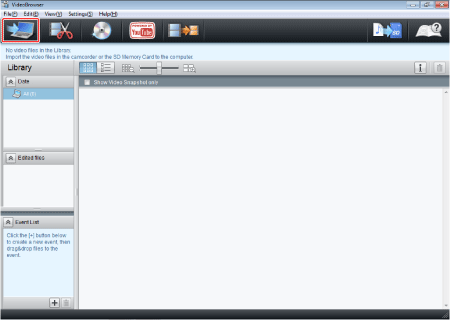
2. Select the memory that contains the video files you want to import.
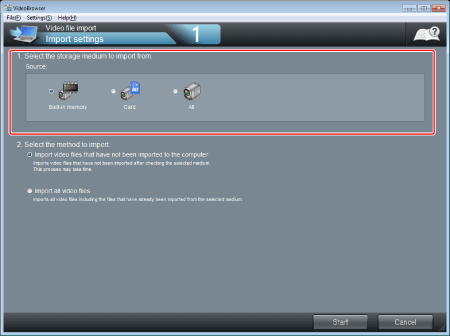
| Icon | Content |
 | The built-in memory of the camcorder. |
 | The SD Memory Card inserted in the camcorder. |
 | Both the built-in memory and SD Memory Card in the camcorder. |
 | A card reader/writer or other devices. |
3. Select the method to import.
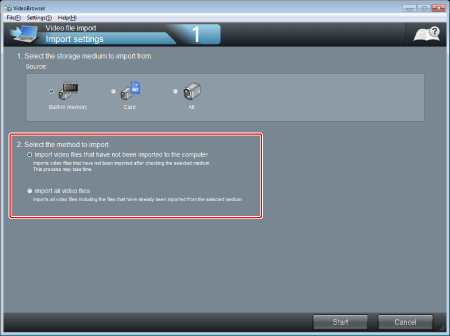
Caution
Imported video files will be saved in the following location:
C:\Users\(User account name)\My Videos\Import Video Data for SD
*Files are saved in [My Documents] if [My Videos] does not exists.
C:\Users\(User account name)\Video\Import Video Data for SD
*Files are saved in [My Document] if [My Video] does not exists.
C:\Documents and Settings\(User account name)\My Documents\My Video\Import Video Data for SD
*Files are saved in [My Documents] if [My video] does not exists.


