

Solution
If you connect a Canon camera to the printer, you can trim the image on your camera for printing.
Caution
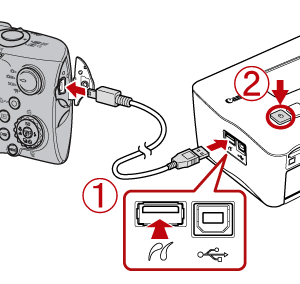
1. Connect the camera to the printer and turn on the printer.


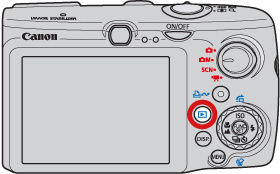
2. Press the ⋖Playback⋗ (
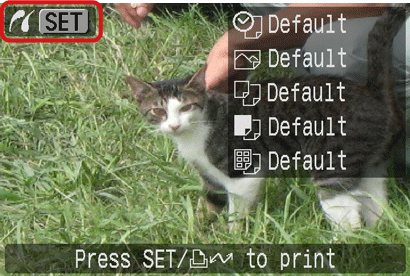
3. The following screen appears on your camera's LCD monitor. Confirm that [SET] appears on the screen.
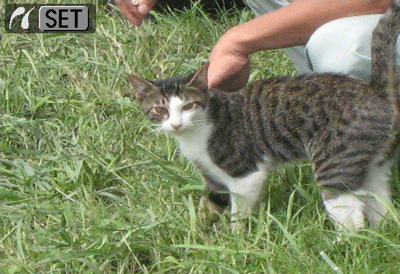
4. Operate the ⋖directional buttons⋗ left or right to display an image to print on the LCD monitor. When the desired image is shown, you want to print, press the ⋖FUNC./SET⋗ (
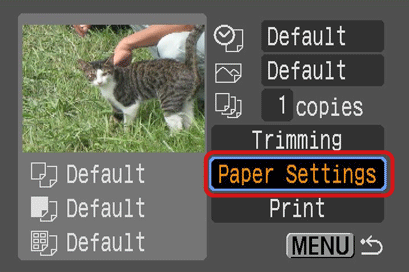
5. The following screen appears. Select [Paper Settings], and press the ⋖FUNC./SET⋗ (
Caution
[Paper Settings] must be selected before [Trimming]. If you select [Paper Settings] after [Trimming], [Trimming] needs to be reset.
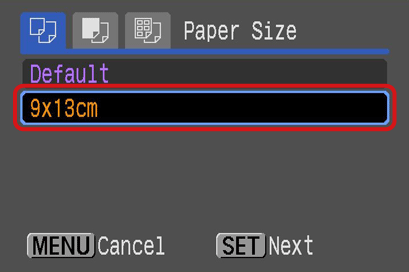
6. The following screen appears. Select the [Paper Size] to print, and press the ⋖FUNC./SET⋗ (
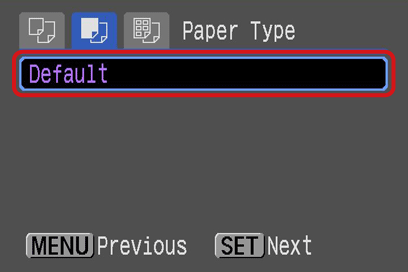
7. The following screen appears. Select [Paper Type] (Type of paper), and press the ⋖FUNC./SET⋗ (
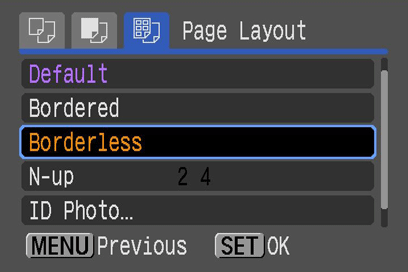
8. The following screen appears. Specify [Borders] and the number of prints made on one sheet, and press the ⋖FUNC./SET⋗ (
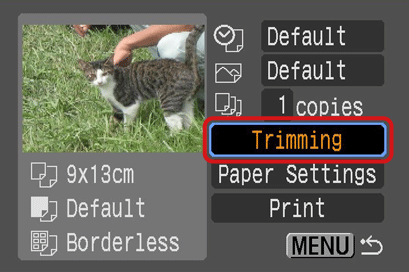
9. The following screen appears. Select [Trimming], and press the ⋖FUNC./SET⋗ (
10. The following screen appears. The green frame displayed on the LCD monitor indicates the print range.
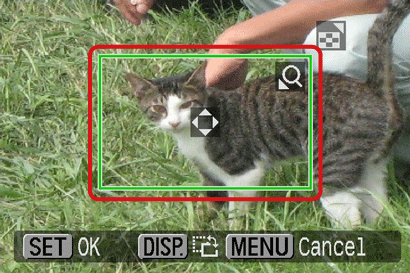
11. Adjust the print range by moving the green frame.
Operate the ⋖directional buttons⋗ up or down to change the position of the frame.
If you want to rotate the green frame, press the ⋖DISP.⋗ (
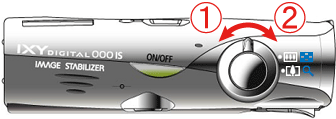
To enlarge or reduce the size of the print range, use the camera ⋖Zoom Lever⋗.
When the print range is set where you want it, press the ⋖FUNC./SET⋗ (
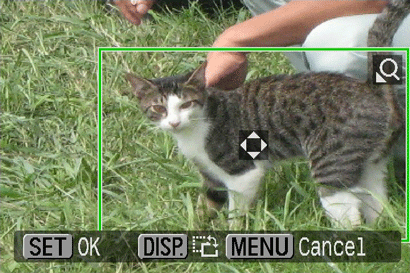
12. The following screen appears.
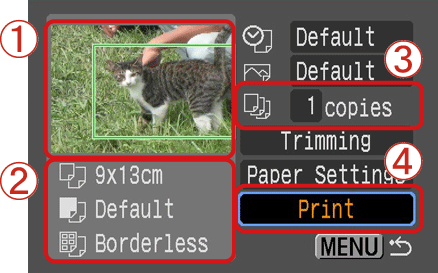

After having confirmed the settings, 
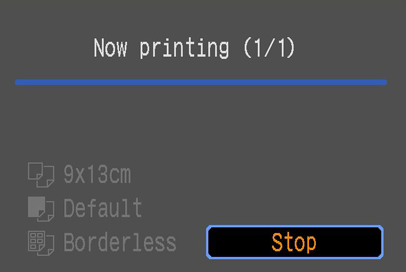
13. When printing starts, the following screen will appear.
14. The trimmed image will be printed.
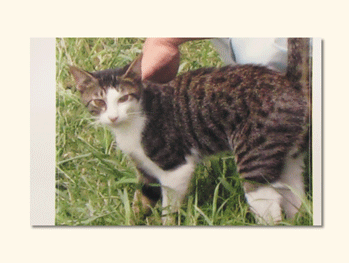
This completes the process of printing after trimming.