

Solution
Install the printer driver on a computer. The printer driver is software required for printing from an application. This section describes the procedure for installing the printer driver on a computer connected to the printer by a USB cable.
Caution
When there is insufficient free hard disk space, a message will appear during the installation. Stop the installation and increase the free space of the disk, and then install the printer driver again.
Caution
1. Uninstall the printer driver used in the print server. [Uninstalling the Printer Driver]
2. Install the new printer driver on the print server. [Installing the Printer Driver]
3. See [Configuring the Print Server] and install the additional driver again.

1. Make sure that the computer and printer are OFF.
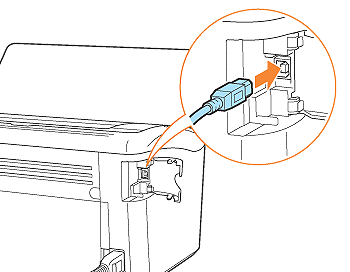
2. Connect the USB cable to the printer.
2-1. Open the USB port cover.
2-2. Connect the B-type (square) end of the USB cable to the USB connector on the printer.
2-3. Close the USB port cover.
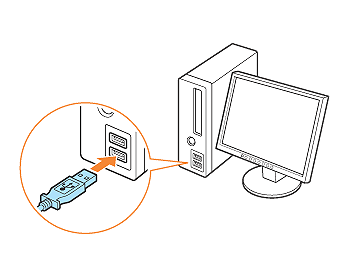
3. Connect the A-type (flat) end of the USB cable to the USB port on the computer.
4. Turn the computer on and start up Windows.
5. Log on as a user with administrator rights.
Caution
6. Insert the "LBP3010/LBP3018/LBP3050 (or LBP3100/LBP3108/LBP3150) User Software" CD-ROM supplied with the printer into the CD-ROM drive.
If the CD-ROM is already in the drive, eject the disk and re-insert it into the drive.
Caution
- If you are using an operating system other than Windows Vista, select [Run] from the [Start] menu, enter "D:\English\MInst.exe", and then click [OK].
- If you are using Windows Vista, enter "D:\English\MInst.exe" in [Start Search] under the [Start] menu, and then press the [ENTER] key on your keyboard.
7. Click [Easy Installation] or [Custom Installation].
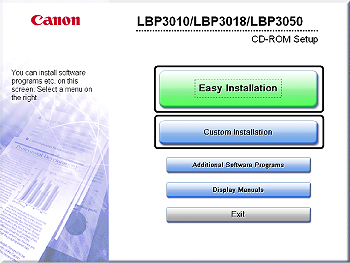
8. Click [Install].
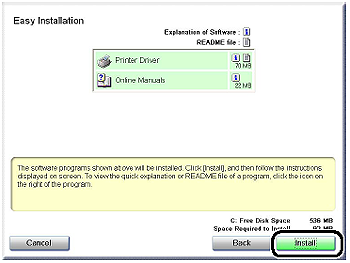
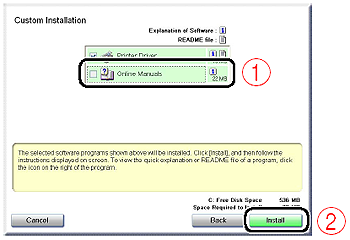
If you selected [Custom Installation] in Step 7, clear the [Online Manuals] check box (1), and then click [Install] (2).
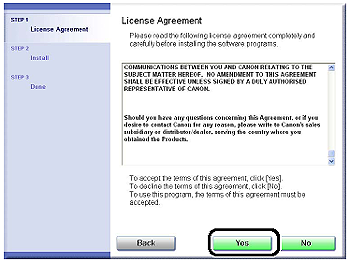
9. Confirm the contents, then click [Yes].
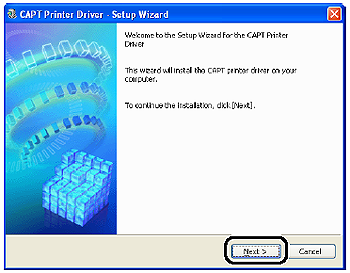
10. Click [Next].
11. Select [Install with USB Connection] (1), then click [Next] (2).

Depending on the system environment, a message that prompts you to restart the computer may appear. In this case, restart the computer and install the printer driver again.
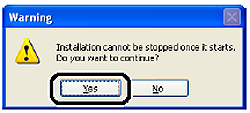
12. Click [Yes].
13. When the following screen is displayed, turn the printer ON.
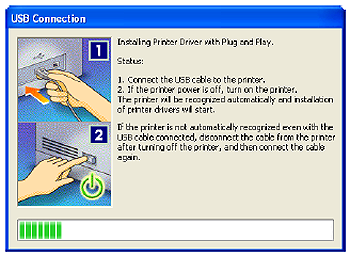
Press the power switch to turn the printer ON.

Installation of the printer driver starts automatically.
If [Easy Installation] was selected in Step 7, User's Guide is installed after the printer driver installation.
Caution
14. Confirm the installation results, then click [Next].
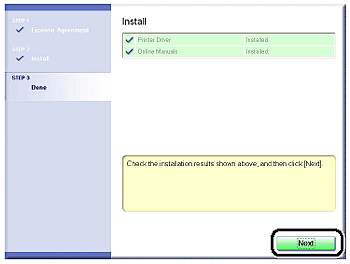
Caution
If the printer driver is not installed properly, see "User's Guide" (HTML manual) in the CD-ROM supplied with the printer.
15. Select the [Restart Computer Now (Recommended)] check box (1), then click [Restart] (2).

Windows restarts.
The installation of the printer driver is completed.
You can take the CD-ROM out of the CD-ROM drive after the installation is completed.